
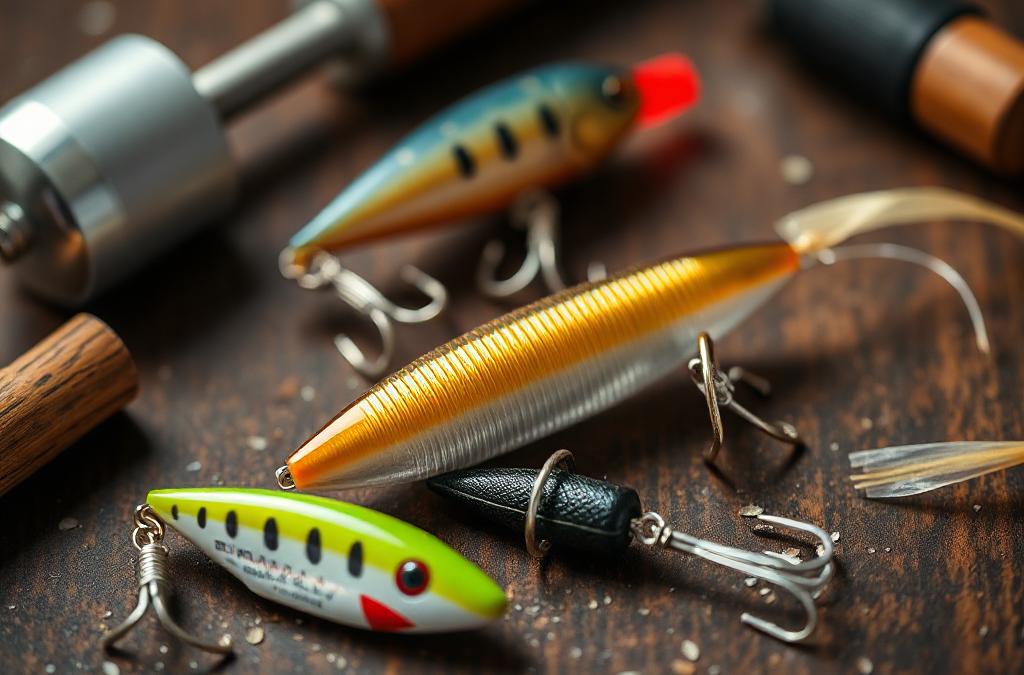
Make your own fishing lures by choosing a simple design, shaping a buoyant or weighted body, adding secure hardware, and testing its movement before using it on the water. Begin with a spoon, soft-plastic mold, spinner, or wooden plug that matches the target species and local forage. Use stainless split rings and hooks sized to the lure rather than oversized hardware that ruins balance, then smooth sharp edges and seal porous materials against water. Test sink rate, wobble, buoyancy, and hook clearance in a bucket or shallow water. Keep records of successful color, weight, and retrieval combinations, because a handmade lure succeeds through repeatable action more than appearance alone.
Choose a Lure Design and Match It to the Fish
The most reliable homemade lure is a simple design built around a clear fishing purpose. Before cutting material or mixing resin, decide whether the lure should float over weeds, suspend near cover, sink into a deep holding area, or flash like a small baitfish. A lure that looks attractive on a workbench may fish poorly if its weight, profile, or action does not suit the target species.

Beginners usually get better results with a spoon, spinner, soft-plastic bait, or basic wooden plug than with a complex jointed crankbait. A spoon needs a curved metal blank, a hole at each end, a split ring, and a hook. A spinner requires a wire shaft, clevis, blade, bead, and hook. A wooden plug demands more shaping and sealing, but it allows careful control of buoyancy and movement. Soft plastics offer flexible action but require a mold and heat-resistant handling.
Match the design to local conditions rather than copying a commercial lure by appearance alone. A narrow spoon can imitate a slender minnow and cut through current, while a wider spoon produces a broader wobble and more lift. A compact spinner may be useful in clear streams where flash and vibration matter, but its exposed hook can collect vegetation. A weedless soft-plastic design may sacrifice some hook exposure in exchange for fewer snags around vegetation.
A practical starting plan is to make three versions of one design instead of three unrelated lures. Change only one variable, such as body weight, blade size, or paint color. That comparison shows whether a lure fails because of poor action or because fish are not responding to its visibility. For more ideas on choosing a purpose before building, use this how to make your own fishing lures reference point as a planning check.
The common mistake is treating color as the main decision. Color matters, but balance, vibration, fall rate, and hook position determine whether the lure behaves naturally. Prioritize the movement you want first, then use color and finish to refine the presentation.
Gather Materials, Hardware, and Safety Equipment
Good lure building depends more on compatible materials and secure hardware than on expensive tools. Useful basics include round-nose and needle-nose pliers, side cutters, a small drill, files, sandpaper, wire, split rings, swivels, hooks, adhesive, paint, and a ruler or small scale. A vise helps hold parts while drilling or bending, but it is not necessary for every design.
Choose body material according to the lure’s intended behavior. Balsa and other light woods float readily and are easy to shape, but they dent and require thorough sealing. Hardwood is tougher and more stable, though it may need more weight to achieve the same action. Metal blanks are durable and naturally reflective, while molded plastic or resin can produce consistent shapes but may require specialized molds and ventilation.
Hardware must be sized as part of the lure, not added at the end. A heavy hook or oversized split ring can make a floating plug sink, mute a spoon’s flutter, or shift the center of gravity away from the intended position. Select hooks that leave enough clearance from the body without making the lure rotate unnaturally. Stainless components are a sensible choice for saltwater, but they still need rinsing and inspection after use.
Adhesives and finishes have different jobs. Epoxy can secure eyes and hardware, while a flexible sealant may be better where a lure repeatedly contacts rocks. Paint should be applied over a clean, dry surface, and porous wood should be sealed before decorative coats are added. Avoid relying on paint to waterproof an unsealed body; water entering through a screw hole or crack can alter buoyancy and weaken the structure.
Safety deserves attention when working with hooks, heated plastic, solvents, resin, or power tools. Wear eye protection when cutting wire or drilling, ventilate areas where coatings are used, and keep heated materials away from skin and combustible surfaces. Store unfinished hooks with points covered. The failure mode to avoid is building a visually polished lure around weak attachment points. Pull-test every eyelet, wire loop, and hook connection before a fish does it for you.
Build the Body, Add Hardware, and Create Action
Shape the body so its center of gravity supports the intended action. A spoon gets its movement from curvature, thickness, and the location of the attachment holes. A wooden plug uses body shape, ballast, and line-tie placement to determine whether it rolls, wobbles, dives, or rises. Small changes can have large effects, so remove material gradually and test between adjustments.
For a simple wooden plug, begin with a straight-grained blank and mark the centerline, nose, tail, and hardware locations. Sand both sides evenly, then drill pilot holes rather than forcing eye screws directly into the wood. If the design needs ballast, place a small amount of weight low in the body and slightly forward or rearward depending on the desired posture. Seal the body before painting, allow each coating to cure, and keep paint away from moving connection points.
Wire-through construction is often stronger than separate screw eyes in soft wood because one continuous wire links the line tie and hook hangers. It takes more preparation, but it reduces the chance that a large fish will pull one attachment from the body. Separate eye screws are quicker for light-duty freshwater lures and can be reasonable when the wood is dense and the connection is properly glued.
When making a spinner, keep the shaft straight and allow each bead, clevis, and blade to rotate freely. The blade should not rub the body or become trapped against a tight bend. A swivel can reduce line twist, especially with spinning blades, but it adds weight and may change how the lure runs. With spoons, file the edges smooth, round the attachment holes, and use a split ring so the hook can pivot instead of binding against the metal.
Soft-plastic lures require a different approach. A simple mold can create repeated tails, paddles, or grub profiles, but the material must be heated and handled according to its product instructions. Keep the mold free of moisture and let finished pieces cool before trimming flash. The common misconception is that more appendages automatically create more attraction. Excessive tails can dampen movement, collect weeds, or make a lure fall too slowly. A compact profile with one active feature is often easier to tune.
For additional build variations, compare the process described here with how to make your own fishing lures using a single material family. Staying with wood, metal, or soft plastic for the first batch makes it easier to identify which construction choice changed the result.
Test, Tune, and Improve Homemade Lures
Testing turns a homemade object into a usable lure. Use a clear container, bathtub, dock edge, or shallow water to watch the lure from several angles. Check whether it tracks straight, reaches its intended depth, rises or sinks at the expected rate, and keeps its hook clear during a retrieve. A lure that rolls onto its side or spins continuously usually needs a change in weight, line-tie alignment, blade position, or body symmetry.

Test slowly before testing fast. A crank-style plug may look stable at a moderate retrieve but blow out when pulled quickly. A spinner may start rotating only after the line reaches tension. A spoon that flutters attractively on the fall may need a slower retrieve than one designed to swim steadily. Record the conditions and adjustments rather than trusting memory.
A compact tuning sequence keeps changes understandable:
- Inspect hook points, split rings, eyelets, and glue joints.
- Measure the lure’s approximate weight and observe its resting position.
- Test a slow, medium, and faster retrieve in open water.
- Change one feature at a time, such as ballast, blade size, or line-tie angle.
- Retest after the finish fully cures and after the lure has contacted cover.
Real-world conditions may expose problems that a bucket cannot. Current can make a balanced lure rise, weeds can stop a spinner blade, and wind can conceal subtle movement on the surface. Test near the structure where the lure will be used, but begin with a short leader and a secure knot so a mistake does not cost the entire rig. If the lure works only in perfectly calm water, treat that as a limitation rather than assuming it will perform everywhere.
Compare handmade results with a commercial lure of similar size and style. The comparison is not a contest; it reveals whether the homemade version produces a comparable track, flash, or fall. If the commercial lure tracks straight while yours rolls, fix balance before experimenting with paint. If both move similarly but fish respond differently, then investigate profile, color, sound, or retrieval speed. A useful log should note water clarity, depth, weather, lure behavior, and strikes, including unsuccessful trips.
Finish each session by rinsing salt or grit from the lure, drying it fully, and checking for swelling, cracks, bent wire, or dulled hooks. A small repair after one outing may preserve the body; ignoring it can allow water intrusion or hardware failure. The next build should change only a measured weakness, not every feature at once. That disciplined approach makes how to make your own fishing lures a repeatable skill rather than guesswork.
For material handling, hook safety, and local use restrictions, consult the instructions supplied with lure-making compounds and the current fishing regulations published by the relevant state, provincial, or national fisheries agency. Regulations may address hooks, lead, protected waters, or permitted methods, so local rules should take priority over general building advice.
Frequently Asked Questions
What is the easiest homemade lure for a beginner?
A spoon or simple spinner is usually the most approachable because it needs limited shaping and its action can be tested immediately. A basic wooden plug is a good next project when you are ready to work with ballast and sealing.
What wood works well for homemade fishing lures?
Light wood is easy to shape and floats readily, while denser wood is tougher and may suit a sinking or suspending design. Seal porous wood thoroughly and test its buoyancy after every major coating.
How do I make a homemade lure stronger?
Use properly sized stainless hardware, reinforce attachment points, and consider a continuous wire-through frame for soft wooden bodies. Pull-test each connection before fishing around heavy cover or strong current.
Why does my homemade lure spin instead of swim?
Spinning often results from an off-center body, uneven weight, a misaligned line tie, or a blade that creates too much torque. Check symmetry first, then make one small adjustment and retest.
Should I paint a lure before testing it?
Test the unpainted or lightly finished lure first. Action and balance are easier to diagnose without a decorative coating, and finishing the lure after tuning prevents wasted paint on a design that needs reshaping.
Further Reading
Authoritative Sources
- Investor.gov
investor.govSEC investor education resources for evaluating financial products and risk.
- FINRA Investor Insights
finra.orgInvestor education, broker-check tools, and financial decision resources.
- Consumer Financial Protection Bureau
consumerfinance.govConsumer guidance on credit, debt, lending, and financial products.
- Internal Revenue Service
irs.govOfficial tax guidance, forms, and compliance information.
Conclusion
Successful homemade lures begin with a defined job: floating over cover, flashing through current, suspending beside structure, or imitating a particular forage shape. Choose a simple design, size the hook and hardware to preserve balance, and protect porous materials with a proper seal. Test the lure before trusting its appearance, then adjust weight, curvature, line-tie position, or blade clearance one variable at a time. The most useful record is not just whether a lure caught a fish; note how it moved, where it ran, and which conditions exposed weaknesses. Build several controlled variations, repair damage promptly, and follow local rules for materials and tackle. With that process, each homemade lure becomes both a fishing tool and a practical experiment in design.

